I’ve been looking for a while for a nice replacement for Photoshop, that I can recommend to people when preparing photos for the web (and for myself when I don’t feel like launching Photoshop just to crop an image). Recently I realized that for Mac users the included Preview app might be the answer.
In this article I’ll be going through some common use cases with image editing and how you can solve them with just Preview.
Resizing photos
Let’s say you have a photo that you’ve taken with a camera, or perhaps you bought one from a stock photo website. You have tried uploading it to a website but it just tells you that it is too big. In most cases this is because the photo has a very high resolution, which is great for printing but not so much on a website. Let’s open the photo in Preview.

Preview will scale the photo to fit your screen, so it can be a bit hard to realize how large it actually is. Just to demonstrate, you can open the
Now, as computers are all about bits and bytes, we want to see how big the photo is in numbers. No need to be scared, you can easily find this by clicking
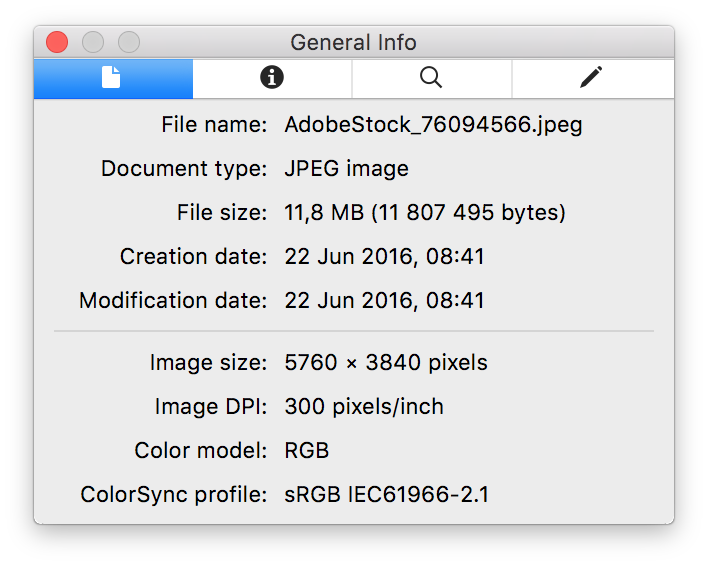
The numbers we’re currently interested in is “File size”, “Image size” and “Image DPI”. We can see here that the photo I’m using has a file size of 11.8 MB. For the web I usually aim for 100-400 KB per photo, which is 0.1-0.4 MB. So my photo is about 30 times larger than it should to be.
We also see that the Image size is quite big, and that the DPI is 300 pixels/inch. Which size you actually want depends a lot of where you’re going to put it, sometimes the website will mention this, and sometimes it will scale automatically. If I don’t have a number to go for, I usually go with 1600 pixels wide. Regarding DPI it’s pretty much always enough with 72 DPI on the web.
How to actually resize the photo
So how do we fix the size? Just select 
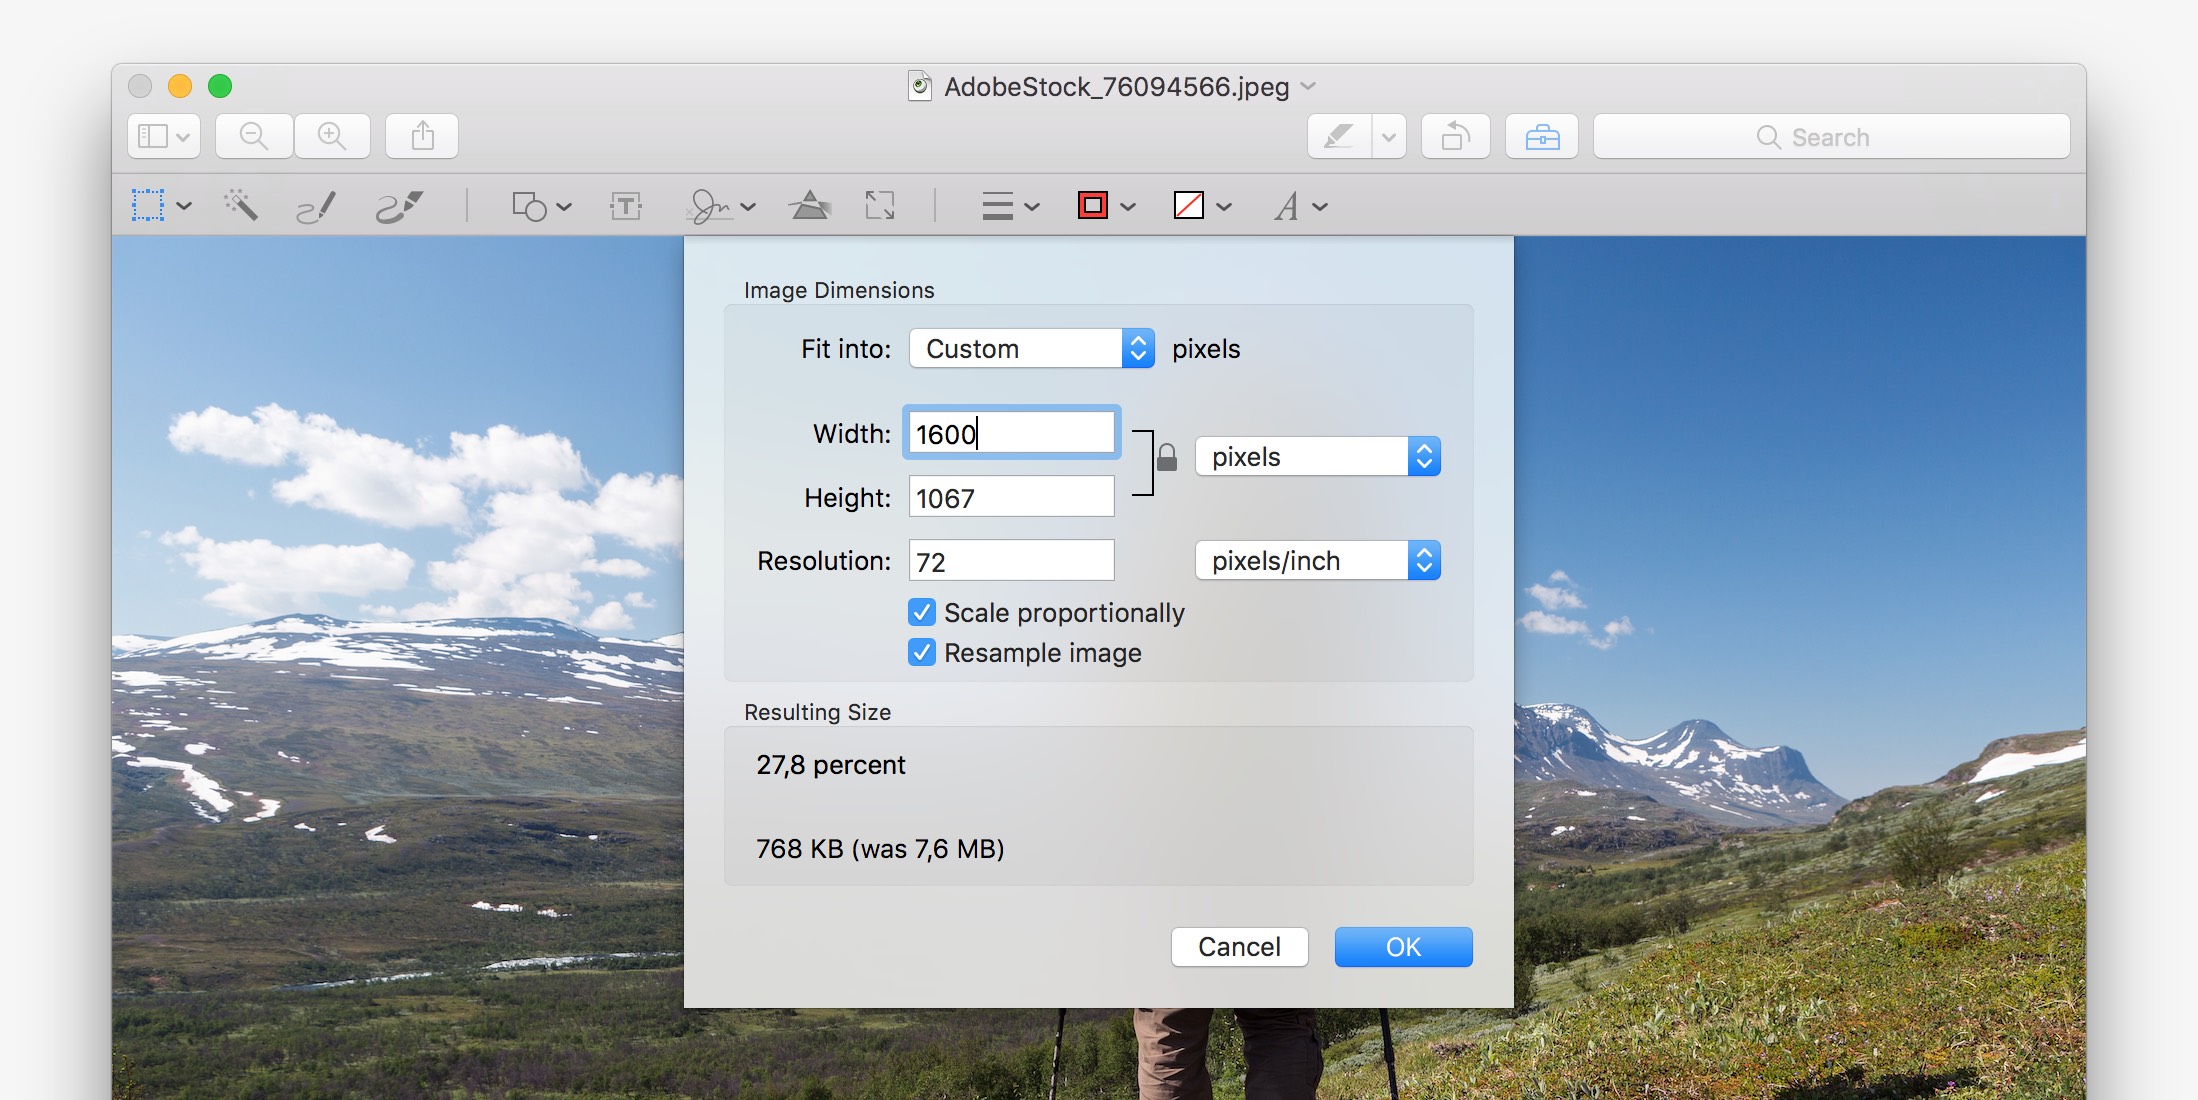
Since I’m not sure what size this photo needs to be, I’m going for 1600 pixels wide, so I will enter this in the Width-field. As long as the checkbox
You might notice that the resulting image size larger than the 100-400 KB I mentioned before, but you don’t have to worry about this yet. We will optimize the image further when saving it, which I will explain in detail further down.
Cropping photos
Sometimes you may want to crop a photo, perhaps to cut away unwanted parts of the picture or to upload as a header on a website.

The easiest way to do this in Preview is simply by clicking and dragging on the photo itself, which will create a rectangular selection. The exact size of the selection will appear while you are dragging. You can also adjust the selection afterwards by dragging the blue dots in the corners and the sides, or move it around by dragging inside the rectangle.
When you are happy with your selection, click on
Crop and resize
If you have an exact size you want to fit your photo into, you may want to combine the steps above to get the best results. For example, on a Facebook page you can add a Cover Photo that will display at 828×315 pixels on a computer.
In that case, I would begin by resizing the photo so one direction (height or width) matches the wanted size, and the other exceeds it. So in this example, I would resize my image to 828 pixels wide. The height would still be 552, which exceeds the 315 we need, so that’s good.
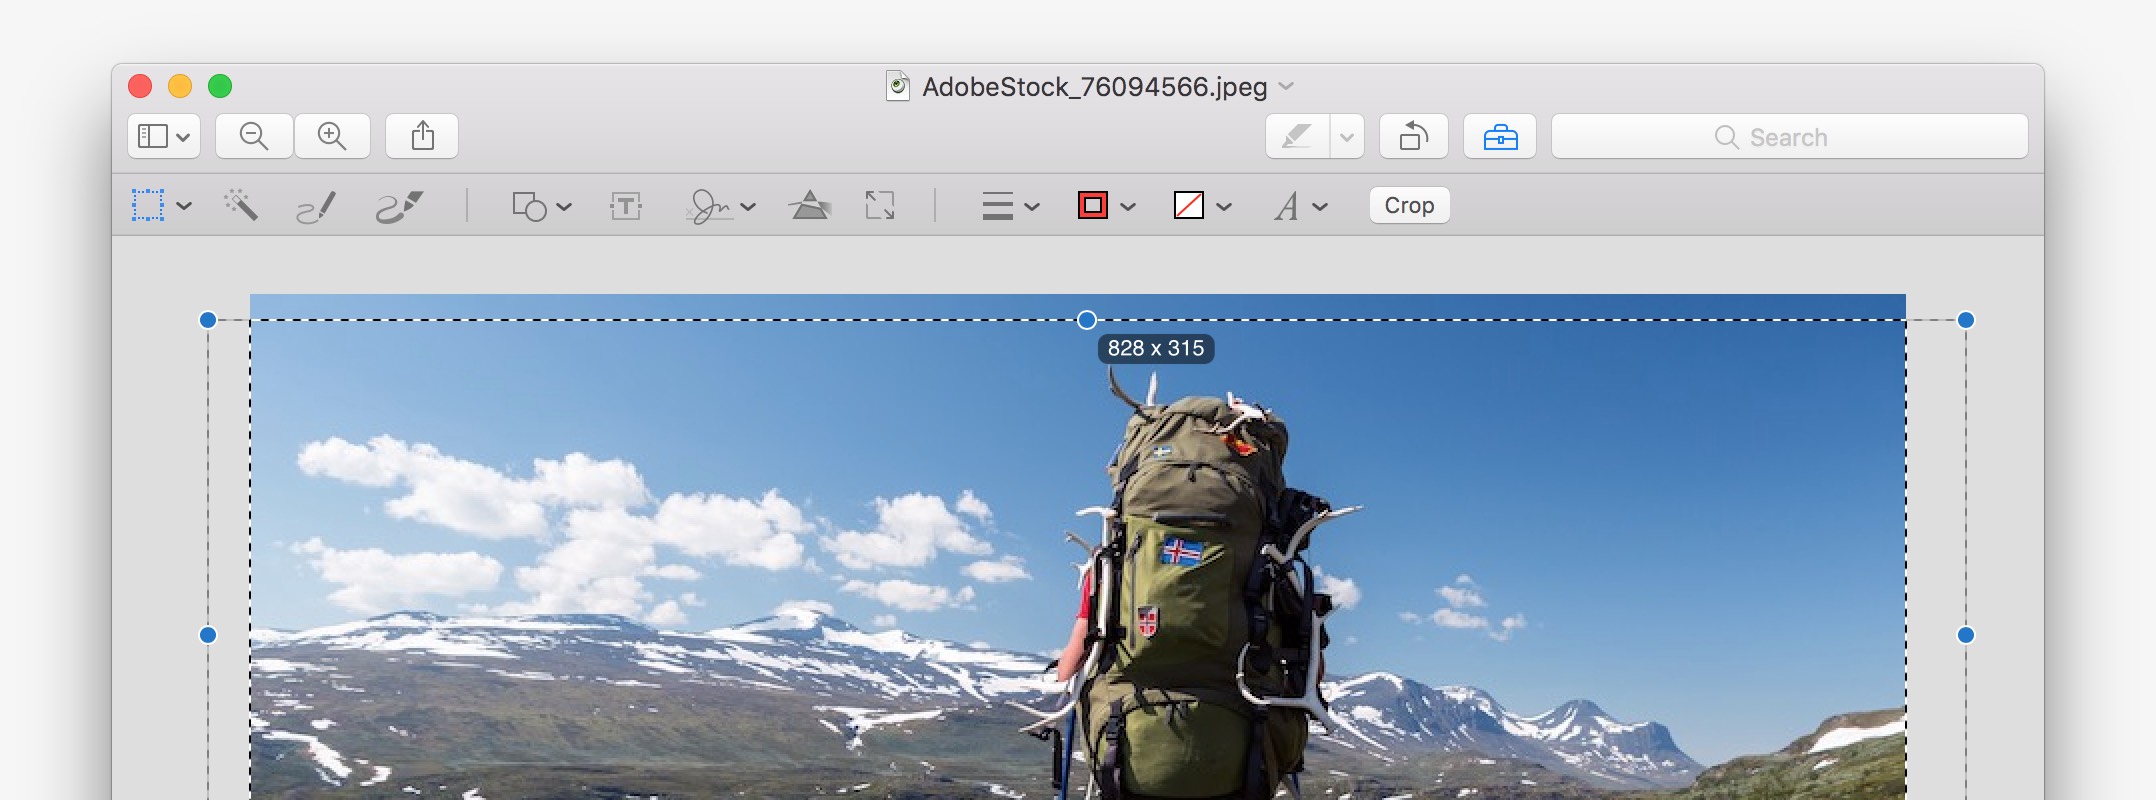
Then to finalize I’d create a selection and adjust it so the height is 315, and then apply the crop like previously described.
Color adjustments
Another neat thing you can do with Preview is adjusting the colors of your photo. I find this especially useful when working with photos where the motive is perfect but the colors feel saturated or too dark. You can also use it too make photos black and white, or even create your own Instagram-like filter, see below for some examples.
You’ll find this tool in 
I won’t go into detail on how this tool works, mostly because I don’t think I can explain it properly. But I can recommend trying it out if you feel like the colors in your photo is too boring. In some cases it’s enough to just press the “Auto Levels” button. If you feel like you’ve messed up there’s always a “Reset all” button.
Adding text, shapes and more
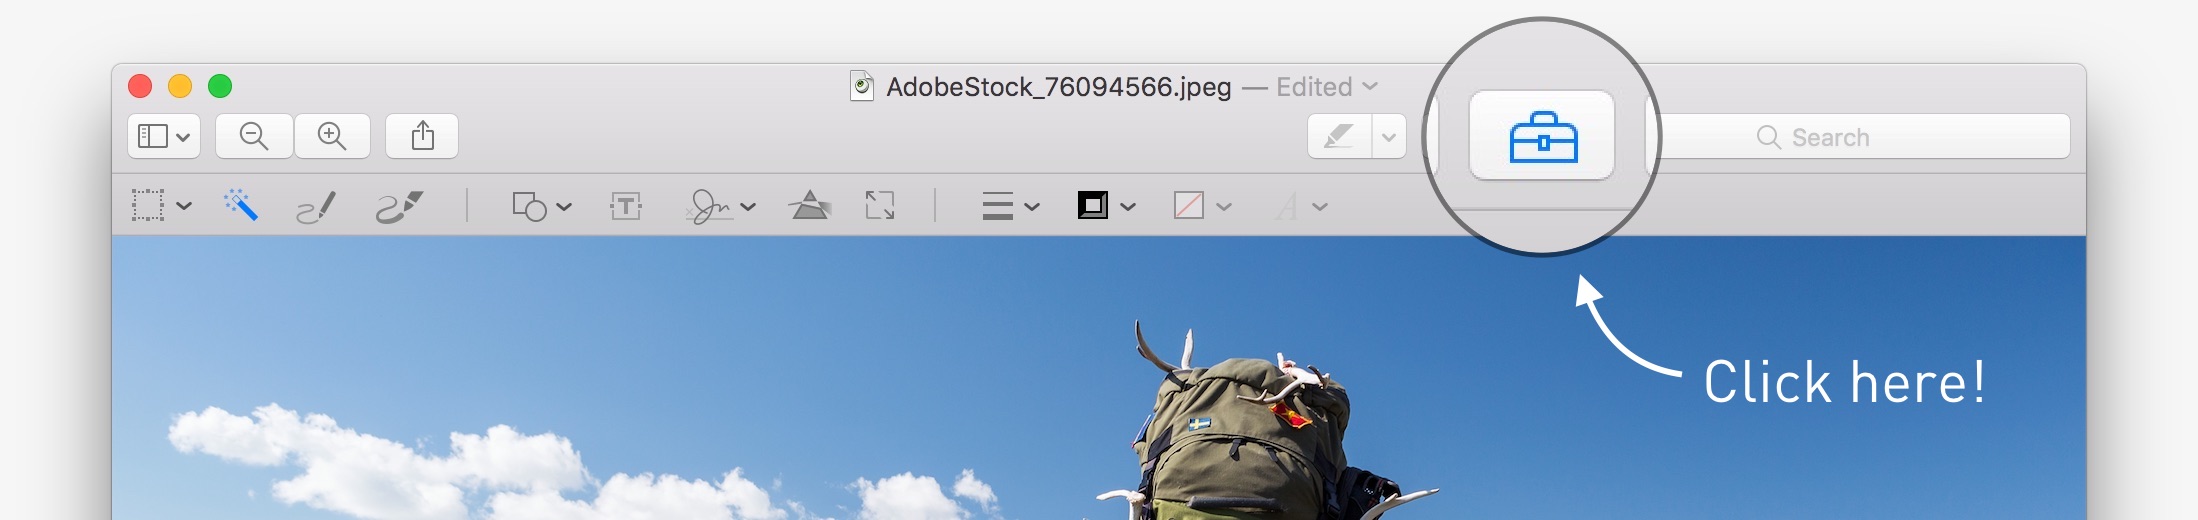
One of my favorite features in Preview (and macOS, since it’s available in Mail too) is the ability to add annotations to your pictures. I use it all the time when I need to send instructions to someone, thanks to the easy ways to add arrows and text in screenshots. Since OS X Yosemite, this is called the Markup Extension and in Preview it shows up like its own toolbar.
If it’s not visible already, click the 
There’s a bunch of markup tools available but I will show you the ones I use the most.
Sketch 
The most powerful feature might be the Sketch tool. It’s a pencil that let you create freehand drawings on your picture. The cool part is, if your drawing is recognized as a standard shape, it will automagically be transformed into an editable version of that shape. You can draw simple lines, shapes, arrows or even speech bubbles.
Now you might ask yourself: can’t I add these shapes directly? The answer is yes, you can, from the 
Draw 
If you want to create freehand drawings without worrying about automatic shapes and stuff, this is the tool for you. If you have a MacBook or trackpad with Force Touch, the brush size even changes depending on the pressure from your finger!
Zoom 
This gem, hidden under the
Text 
When you want to write text, you use this tool. It’s very straightforward. You can change the font and formatting with the 
If you want to learn more about the other Markup tools that are available, check out this Apple support page.
Saving for the web
Now that we’re happy with the photo it’s time to save it. And if we want to use it on the web, we probably want to make sure that the file size isn’t too big. Begin by clicking
Here you will have to decide which format to save the image as. If you’re working with a photo, JPEG is pretty much always the right choice. It’s an image format that compress the file size by sacrificing some of image quality. You can adjust how much you want to compress, allowing a selectable tradeoff so you can decide on a file size with as unnoticable change in quality as possible.
If you are working with logos, screenshots, or something else where you don’t want to affect the image quality, PNG is the format you want. It uses “lossless” compression, meaning that it makes the file size smaller without affecting the image quality at all. However, compared to JPG this results in much larger files, which is why it isn’t used for photos. A bonus however is that PNG also supports transparency, which can be useful for logos.
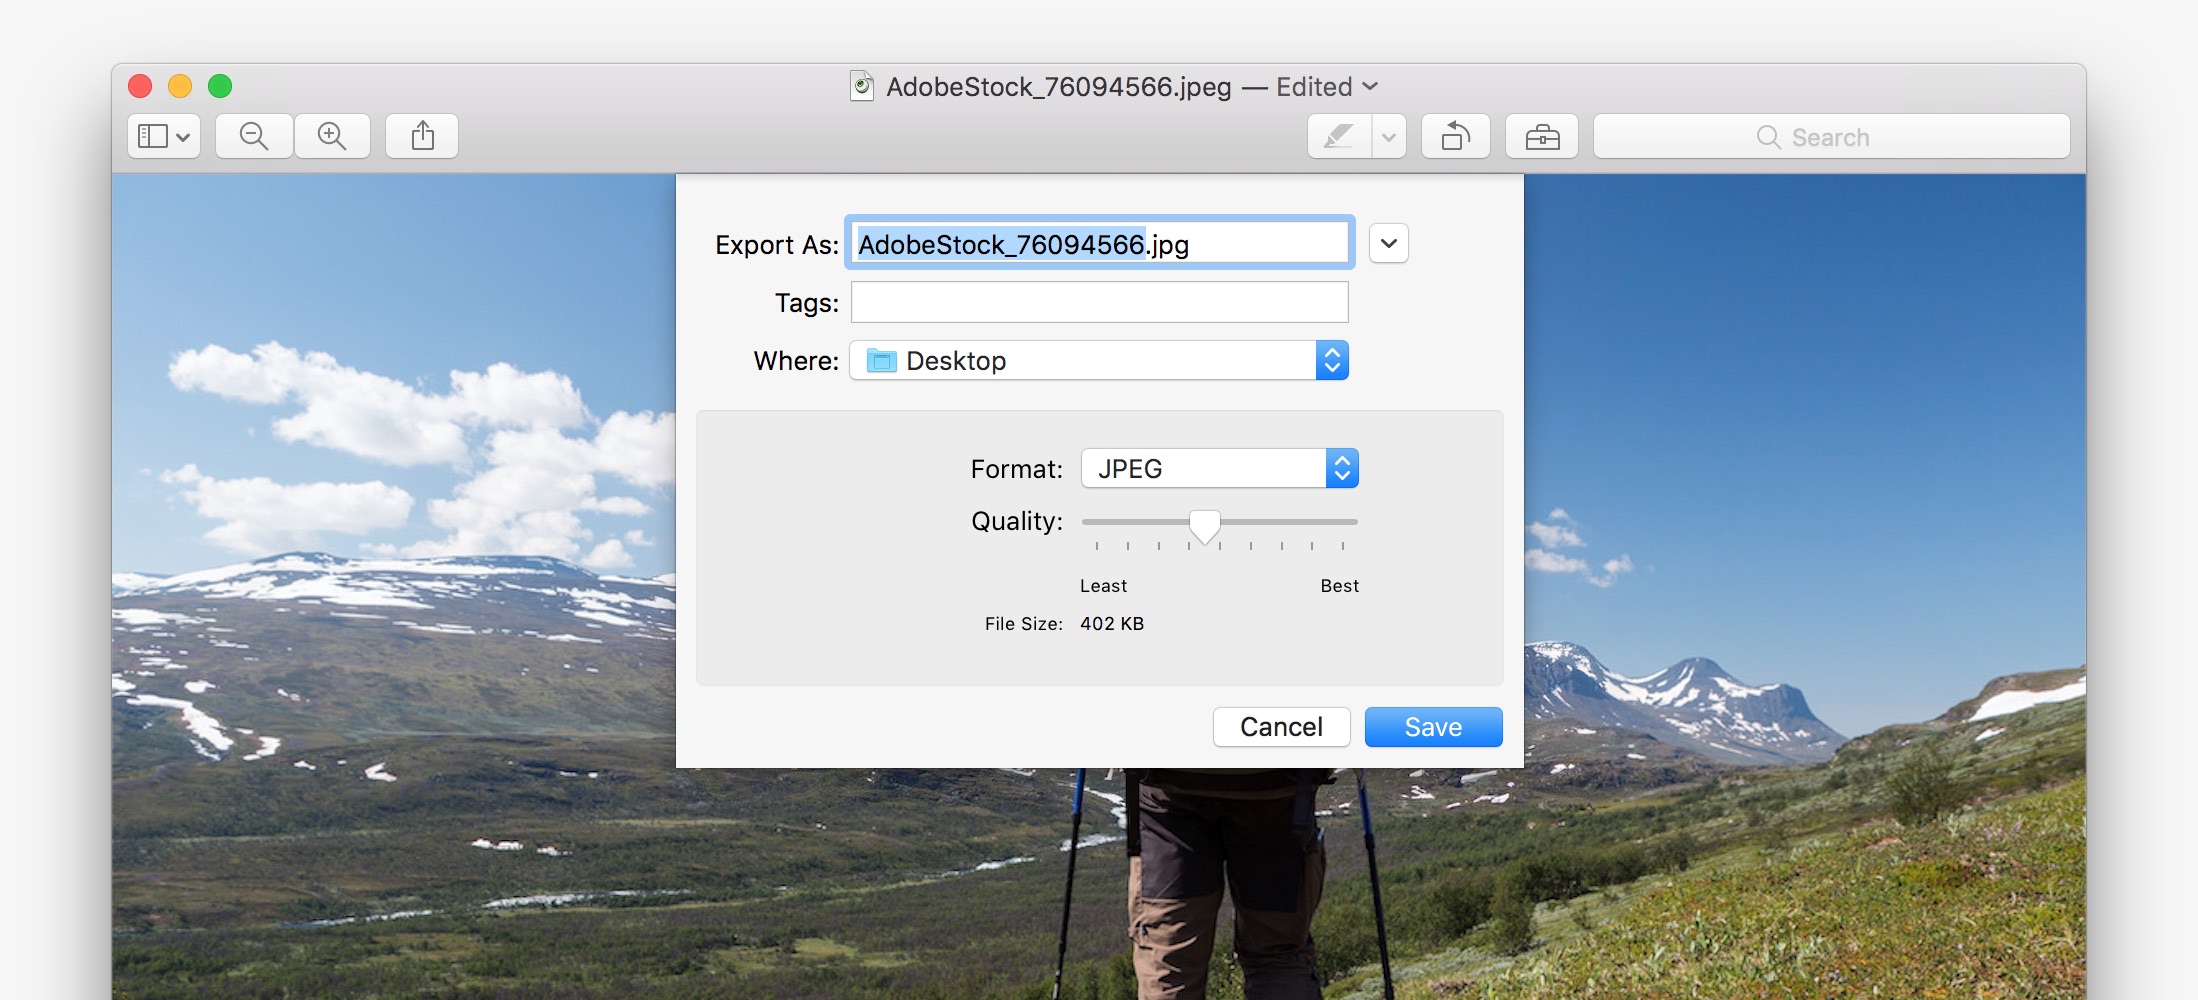
As you can see above, I had to turn down the quality a lot to fit into my 400 KB limit. If the final result turns out too bad, I’d probably see if I can crop it, resize it, or make an exception to the rule and let the file size grow. Applications like Photoshop shows a side-by-side comparison with the original and the compressed image, but sadly this isn’t the case with Preview. We’ll just have to see after we’ve saved it.
Closing words and cheatsheet
That was the end of my little tutorial. I hope it made sense and that it serves you well! Below is a quick cheatsheet if you want to refresh you just want to refresh your memory on hotkeys or such.
| Show information | |
| Resize image | |
| Crop image |
|
| Adjust colors | |
| Toggle Markup toolbar | |
| File formats |
JPEG: Photos PNG: Logos, screenshots |
| File size | Aim for less than 100-400 KB, depending on image size |
Let me know in the comments if this article helped you, if I need to explain something better or if you have your own useful tips to share! Thanks for reading!